Spooky Halloween Marble Cake
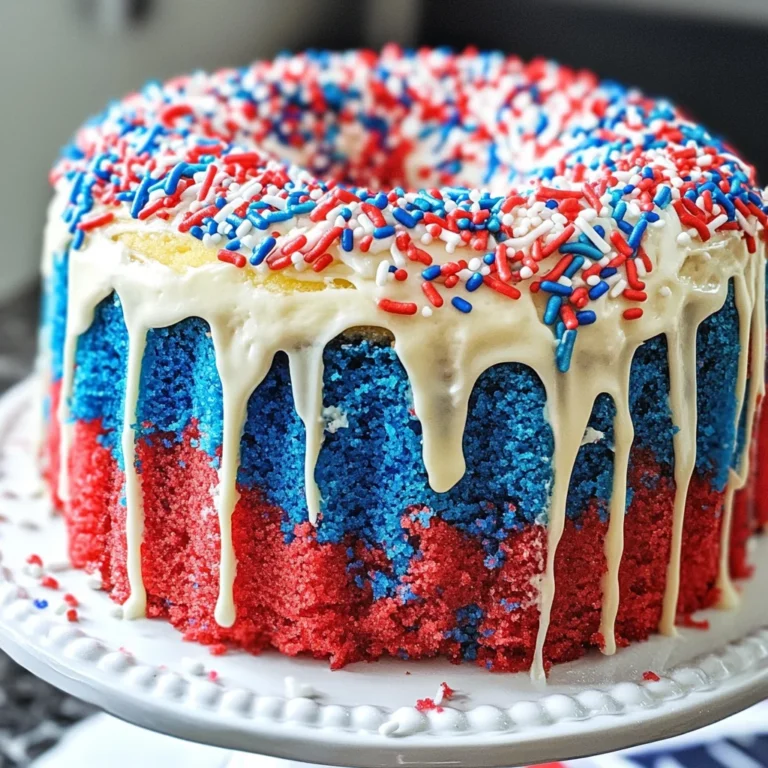
This Spooky Halloween Marble Cake is a hauntingly delightful treat perfect for your Halloween parties! The striking red and black marbled layers come together to create a visually stunning dessert that will wow your guests. The cake is artfully decorated with drippy red blood and adorned with bloody bones and eyeball sprinkles, making it an unforgettable centerpiece for any spooky celebration.
Why You’ll Love This Recipe
- Visually Striking: The vibrant colors and unique design make this cake a showstopper at any Halloween gathering.
- Moist and Flavorful: A combination of buttermilk and bittersweet chocolate ensures each slice is rich and delicious.
- Fun Decoration: Get creative with the blood-like icing and spooky sprinkles to personalize your cake for the occasion.
Tools and Preparation
To make the Spooky Halloween Marble Cake, you will need a few essential tools to ensure everything goes smoothly.
Essential Tools and Equipment
- Stand mixer or hand mixer
- Mixing bowls
- Measuring cups and spoons
- Rubber spatula
- 9-inch round cake pans (2)
- Cooling rack
Importance of Each Tool
- Stand mixer or hand mixer: Makes mixing the batter easy, ensuring all ingredients are well combined.
- Mixing bowls: Having multiple bowls allows for efficient ingredient preparation without mixing flavors.
- Cooling rack: Helps cool the cakes evenly, preventing sogginess after baking.
Ingredients
For the Spooky Halloween Marble Cake, gather the following ingredients:
For the Cake Batter
- 2 1/4 cups (293g) all purpose flour
- 2 1/2 tsp baking powder
- 1/4 tsp baking soda
- 1/2 tsp salt
- 1/2 cup (112g) unsalted butter, room temperature
- 1/2 cup vegetable oil
- 1 1/2 cups (310g) sugar
- 1 tbsp vanilla extract
- 4 large eggs
- 1 cup (240ml) buttermilk
- 5 oz bittersweet chocolate (60% cacao), chopped
For the Frosting and Decoration
- Black gel icing color
- Red gel icing color
- 2 1/4 cups (504g) unsalted butter
- 8 cups (920g) powdered sugar
- 1 cup (114g) natural unsweetened cocoa powder
- 2 tsp vanilla extract
- 5-7 tbsp (75-105ml) water/cream
- 1/4 tsp salt
- Black gel icing color
- 4 oz red Wilton candy melts
- 2 tbsp heavy whipping cream
- Sprinkles (see notes)
How to Make Spooky Halloween Marble Cake
Step 1: Preheat the Oven
Preheat your oven to 350°F (175°C). Grease two 9-inch round cake pans with cooking spray or butter.
Step 2: Prepare the Cake Batter
In a large mixing bowl:
1. Whisk together all-purpose flour, baking powder, baking soda, and salt.
2. In another bowl, beat together butter, vegetable oil, sugar, and vanilla extract until creamy.
3. Add eggs one at a time, beating well after each addition.
4. Gradually mix in the dry ingredients along with buttermilk until just combined.
Step 3: Create the Marble Effect
Divide half of the batter into another bowl.
1. Melt bittersweet chocolate in a microwave-safe bowl.
2. Stir melted chocolate into one portion of the batter until fully incorporated.
3. Alternate spoonfuls of both batters into prepared cake pans to create a marbled effect using a knife or skewer to swirl them together.
Step 4: Bake the Cakes
Bake in preheated oven for about 20 minutes or until a toothpick inserted in the center comes out clean. Let cakes cool in pans for about 10 minutes before transferring to a cooling rack.
Step 5: Prepare Frosting
In a large mixing bowl:
1. Beat softened butter until creamy.
2. Gradually add powdered sugar and cocoa powder while mixing on low speed until combined.
3. Add vanilla extract, salt, and enough water or cream to achieve desired consistency; mix until fluffy.
Step 6: Assemble Your Cake
Once cooled:
1. Place one layer on a serving platter; spread frosting on top.
2. Place second layer on top; frost sides and top of cake as desired.
Step 7: Add Decorations
Melt red candy melts with heavy cream over low heat until smooth. Drizzle over top of frosted cake for “blood.” Finish by adding black gel icing designs or sprinkles for an eerie touch!
Enjoy your Spooky Halloween Marble Cake, guaranteed to be a hit at any celebration!
How to Serve Spooky Halloween Marble Cake
Serving your Spooky Halloween Marble Cake can be as fun and festive as making it! Here are some creative ideas to enhance your presentation and delight your guests.
Festive Platter
- Arrange slices of the cake on a spooky-themed platter with Halloween decorations like plastic spiders or cobwebs for an eerie touch.
Individual Servings
- Serve each slice in cupcake liners or small dessert cups topped with extra blood icing for a personal touch that adds to the theme.
Pair with Drinks
- Offer a selection of themed drinks, such as blood orange lemonade or spooky punch, to complement the cake’s flavors and enhance the Halloween vibe.
Ice Cream Side
- Serve warm slices of cake with a scoop of vanilla or chocolate ice cream. The creamy texture pairs well with the rich flavors of the marble cake.
How to Perfect Spooky Halloween Marble Cake
Perfecting your Spooky Halloween Marble Cake ensures it looks and tastes fantastic for your celebration. Here are some tips to help you achieve that:
-
Use room temperature ingredients: Allow butter, eggs, and buttermilk to sit out before mixing. This helps achieve a smoother batter and better rise.
-
Sift dry ingredients: Sifting flour and cocoa powder removes lumps and ensures even distribution in the batter, leading to a uniform texture.
-
Swirl carefully: When marbling, use a skewer or knife to gently swirl the chocolate batter into the vanilla batter without over-mixing. This creates beautiful marbled patterns.
-
Monitor baking time: Check for doneness by inserting a toothpick in the center; it should come out clean or with few crumbs. This prevents overbaking, which can dry out the cake.
Best Side Dishes for Spooky Halloween Marble Cake
Pairing side dishes with your Spooky Halloween Marble Cake can elevate your dessert spread. Here are some delightful options:
-
Witch’s Brew Punch – A refreshing mix of fruit juices and soda, garnished with gummy worms for an added spookiness.
-
Cheesy Jack-O’-Lantern Quesadillas – Fun-shaped quesadillas filled with cheese and veggies, perfect for dipping in salsa.
-
Creepy Crawly Veggie Platter – An assortment of colorful vegetables arranged in a creepy design, served with hummus or ranch dressing.
-
Ghostly Guacamole Dip – Smooth guacamole shaped like ghosts, served alongside crispy tortilla chips for a tasty snack.
-
Monster Fruit Skewers – Skewers filled with assorted fruits like grapes, melon balls, and strawberries, creating colorful monster faces.
-
Graveyard Dirt Cups – Chocolate pudding layered with crushed cookies and topped with gummy worms, bringing a fun twist to your dessert table.
Common Mistakes to Avoid
When making your Spooky Halloween Marble Cake, there are a few common mistakes that can affect the outcome. Here are some tips to help you avoid them.
- Ignoring ingredient temperature – Using cold eggs or butter can lead to a dense cake. Make sure your butter is at room temperature and your eggs are not cold from the fridge.
- Overmixing the batter – Overmixing can cause the cake to be tough. Mix just until the ingredients are combined for a light and fluffy texture.
- Not measuring flour correctly – Scooping flour directly from the bag can pack it down, leading to too much flour. Use the spoon-and-level method for accurate measurements.
- Skipping the cooling time – Cutting into the cake while it’s still warm can make it fall apart. Allow it to cool completely before slicing.
- Neglecting decoration details – A spooky presentation enhances the theme. Don’t skip on adding drippy red blood and fun sprinkles to make it visually appealing.
Storage & Reheating Instructions
Refrigerator Storage
- Store in an airtight container for up to 5 days.
- Keep layers separated with parchment paper to prevent sticking.
Freezing Spooky Halloween Marble Cake
- Wrap tightly in plastic wrap and aluminum foil for up to 3 months.
- Thaw in the refrigerator overnight before serving.
Reheating Spooky Halloween Marble Cake
- Oven – Preheat to 350°F (175°C). Wrap in aluminum foil and heat for about 10-15 minutes.
- Microwave – Heat individual slices on medium power for about 20-30 seconds.
- Stovetop – Place slices in a skillet over low heat, covering with a lid until warmed through.
Frequently Asked Questions
Here are some common questions regarding the Spooky Halloween Marble Cake that might help you during your baking process.
How do I achieve perfect marbling in my Spooky Halloween Marble Cake?
To get beautiful marbling, pour alternate layers of vanilla and chocolate batter into the pan. Use a knife or skewer to gently swirl them together without overmixing.
Can I use different colors for my icing?
Absolutely! While black and red create a spooky vibe, you can choose any colors that fit your theme or personal preference.
What should I do if my cake sinks in the middle?
A sinking cake could be due to underbaking or too much leavening agent. Ensure accurate measurements and bake until a toothpick comes out clean.
How long does it take to bake this Spooky Halloween Marble Cake?
The total time is approximately 2 hours and 5 minutes, including preparation and baking. Make sure to check for doneness around the 20-minute mark.
Can I make this cake ahead of time?
Yes! This cake stores well; you can bake it a day or two ahead of your event. Just ensure proper storage methods to keep it fresh.
Final Thoughts
This Spooky Halloween Marble Cake is not only visually striking but also deliciously versatile. You can customize flavors, colors, and decorations based on your personal taste or party theme. Give this recipe a try, and delight your guests with this festive treat!
Spooky Halloween Marble Cake
Get ready to impress your guests with this Spooky Halloween Marble Cake, a visually stunning and delicious centerpiece for your Halloween festivities. With its eye-catching red and black marbled layers, this cake not only looks hauntingly delightful but also tastes rich and flavorful, thanks to the combination of buttermilk and bittersweet chocolate. The fun decorations like drippy red icing and spooky sprinkles make it an unforgettable treat that will have everyone talking. Perfect for parties, this cake allows you to unleash your creativity while indulging in a moist and scrumptious dessert.
- Prep Time: 30 minutes
- Cook Time: 20 minutes
- Total Time: 50 minutes
- Yield: 12 servings 1x
- Category: Dessert
- Method: Baking
- Cuisine: American
Ingredients
- 2 1/4 cups all purpose flour
- 2 1/2 tsp baking powder
- 1/4 tsp baking soda
- 1/2 tsp salt
- 1/2 cup unsalted butter, room temperature
- 1/2 cup vegetable oil
- 1 1/2 cups sugar
- 1 tbsp vanilla extract
- 4 large eggs
- 1 cup buttermilk
- 5 oz bittersweet chocolate, chopped
- Black gel icing color
- Red gel icing color
- 2 1/4 cups unsalted butter
- 8 cups powdered sugar
- 1 cup natural unsweetened cocoa powder
- 2 tsp vanilla extract
- 5–7 tbsp water/cream
- 1/4 tsp salt
- 4 oz red candy melts
- 2 tbsp heavy whipping cream
- Sprinkles
Instructions
- Preheat oven to 350°F (175°C) and grease two 9-inch round cake pans.
- In a large mixing bowl, whisk together flour, baking powder, baking soda, and salt.
- In another bowl, beat together butter, vegetable oil, sugar, and vanilla extract until creamy. Add eggs one at a time, beating well after each addition.
- Gradually mix in the dry ingredients along with buttermilk until just combined.
- Divide half of the batter into another bowl. Melt bittersweet chocolate in a microwave-safe bowl and stir into one portion of the batter until fully incorporated.
- Alternate spoonfuls of both batters into prepared cake pans, swirling them together with a knife or skewer to create a marbled effect.
- Bake in preheated oven for about 20 minutes or until a toothpick inserted in the center comes out clean. Let cakes cool in pans for about 10 minutes before transferring to a cooling rack.
- To prepare frosting, beat softened butter until creamy. Gradually add powdered sugar and cocoa powder while mixing on low speed until combined. Add vanilla extract, salt, and enough water or cream to achieve desired consistency; mix until fluffy.
- Once cooled, place one layer on a serving platter and spread frosting on top. Place second layer on top; frost sides and top of cake as desired.
- Melt red candy melts with heavy cream over low heat until smooth and drizzle over top of frosted cake for 'blood.' Finish by adding black gel icing designs or sprinkles for an eerie touch!
Nutrition
- Serving Size: 1 slice
- Calories: 450
- Sugar: 39g
- Sodium: 150mg
- Fat: 22g
- Saturated Fat: 9g
- Unsaturated Fat: 11g
- Trans Fat: 0g
- Carbohydrates: 56g
- Fiber: 2g
- Protein: 5g
- Cholesterol: 60mg

