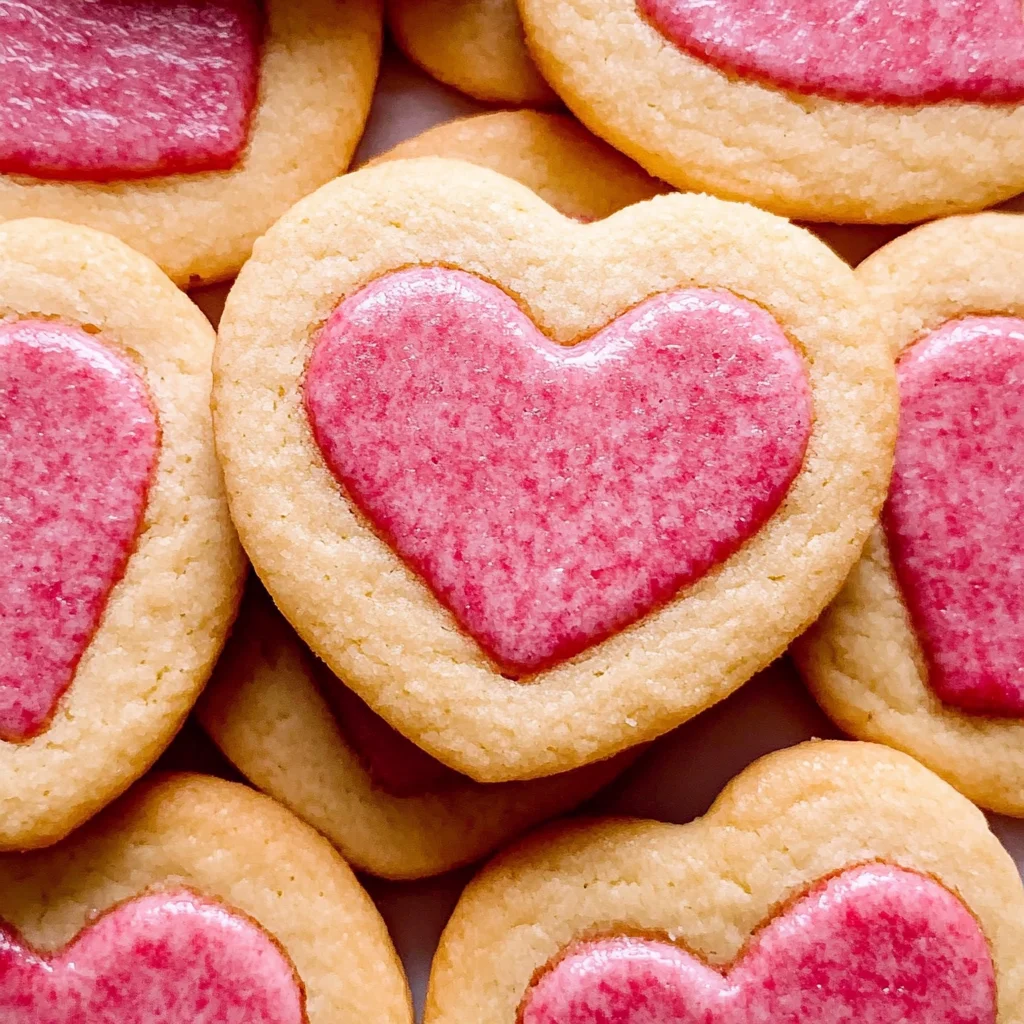
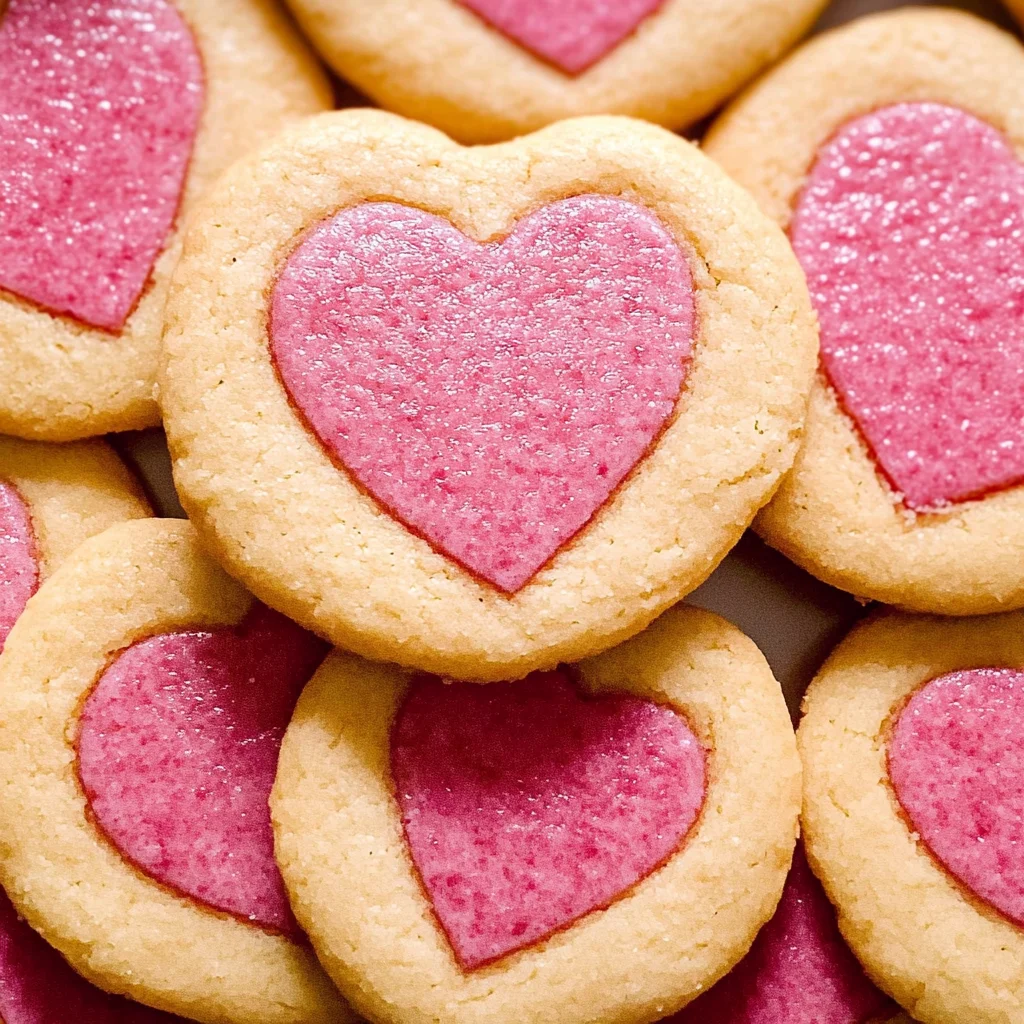
Slice and Bake Valentine’s Day Cookies
Remember those slice and bake cookies from your childhood that came in a tube? These homemade Slice and Bake Valentine’s Day Cookies are surprisingly easy to make, taste better than the original, and are free from preservatives and artificial coloring. Perfect for sharing with loved ones, these cookies are ideal for various occasions, including Valentine’s Day or just a sweet treat any day of the year. The vibrant colors and fun heart shapes will surely impress friends and family alike!
Why You’ll Love This Recipe
- Quick and Simple: These cookies come together in just over an hour, making them perfect for when you’re short on time.
- Customizable Flavors: Feel free to mix in your favorite extracts or spices to create a unique flavor profile.
- Fun for Everyone: Great for kids and adults alike, making baking a shared activity that everyone can enjoy.
- Stunning Presentation: The heart shapes and colorful dough make these cookies visually appealing—perfect for gifting!
- Make Ahead: Prepare the dough in advance, freeze it, and bake fresh cookies whenever you need them.
Tools and Preparation
Before you begin baking these delightful cookies, gather your tools. Having the right equipment will streamline your process and ensure a smooth baking experience.
Essential Tools and Equipment
- Mixing bowl
- Stand mixer (optional)
- Whisk
- Cookie cutter (small heart shape)
- Parchment paper
- Plastic wrap
Importance of Each Tool
- Mixing bowl: A sturdy bowl allows you to mix ingredients easily without spills.
- Stand mixer: While optional, it saves time by quickly beating butter and sugar until fluffy.
- Cookie cutter: Using a small heart-shaped cutter ensures uniformity in size for beautiful presentation.
Ingredients
For these delicious Slice and Bake Valentine’s Day Cookies, you will need:
- 3/4 cup unsalted butter, softened to room temperature
- 1 cup granulated sugar
- 1 teaspoon vanilla extract
- 2 large eggs
- 2 1/2 cups all purpose flour
- 1 teaspoon baking powder
- 1/2 teaspoon salt
- Red or pink food coloring (we used this natural food coloring)
How to Make Slice and Bake Valentine’s Day Cookies
Step 1: Mix Wet Ingredients
- Add butter, sugar, and vanilla extract to a large mixing bowl (or stand mixer).
- Beat at medium speed until light and fluffy, about 3 minutes.
Step 2: Incorporate Eggs
- Add in eggs, one at a time.
- Mix just until combined after each addition.
Step 3: Combine Dry Ingredients
- In a separate bowl, whisk together flour, baking powder, and salt.
Step 4: Combine Wet and Dry Mixtures
- Gradually add the dry ingredients to the wet mixture in 3-4 batches.
- Mix until the dough comes together. If too wet, add an additional 1-2 tbsp of flour as needed.
Step 5: Color the Dough
- Remove about 1/2-2/3 of the dough and set aside.
- Add several drops of food coloring to the remaining dough; mix until combined.
- Adjust food coloring until desired hue is achieved.
Step 6: Shape the Colored Dough
- Place the pink dough in the freezer for 5 minutes.
- Roll out into a rectangle about 1/2-inch thick on a lightly floured surface.
- Return to the freezer for another 20 minutes.
Step 7: Cut Out Hearts
- Use a small heart cookie cutter (about 1.5 across) to cut out hearts from the colored dough.
- Lightly rub water on floured sides of each heart before stacking them together—this helps them stick.
Step 8: Form the Log
- Repeat until you have created a log about 10 inches long with stacked hearts.
- Return this log to the freezer for at least 30 minutes or until frozen solid.
Step 9: Encase Hearts in Cookie Dough
- Remove from freezer; press plain cookie dough around hearts firmly to avoid gaps.
- Roll into a smooth log shape.
Step 10: Chill Before Baking
- Wrap the log in plastic wrap; chill for at least another 30 minutes.
Step 11: Preheat Oven
Preheat oven to 350˚F (175˚C) and line two baking sheets with parchment paper.
Step 12: Slice and Bake
When ready to bake:
1. Slice the dough into rounds about 1/4 inch thick.
2. Space them about 2 inches apart on prepared baking sheets.
3. Bake for approximately 12 minutes or until bottoms are light golden brown.
4. Remove from oven; let cool on wire racks before serving.
Enjoy your delightful homemade Slice and Bake Valentine’s Day Cookies!
How to Serve Slice and Bake Valentine’s Day Cookies
These delightful slice and bake Valentine’s Day cookies can be enjoyed in several fun ways that enhance their appeal. Whether you’re hosting a gathering or simply want to add a festive touch to your day, here are some serving suggestions.
With Coffee or Tea
- Pair your cookies with a warm cup of coffee or tea for a cozy treat. The sweetness of the cookies complements the bitterness of the drinks beautifully.
As Dessert Platter
- Create a dessert platter by arranging these cookies alongside other desserts like brownies or fruit tarts. This adds variety and visual appeal to your dessert table.
Gift Wrapping
- Package the cookies in decorative boxes or bags as gifts for friends and loved ones. Personalizing them with a handwritten note makes it an extra special gesture.
Cookie Sandwiches
- Spread some frosting between two cookies to create delicious cookie sandwiches. This adds an exciting twist to the classic cookie experience.
With Ice Cream
- Serve warm cookies with a scoop of vanilla or strawberry ice cream on top. The combination of warm and cold creates a delightful contrast.
How to Perfect Slice and Bake Valentine’s Day Cookies
To ensure your slice and bake Valentine’s Day cookies turn out perfectly every time, follow these helpful tips.
- Use softened butter: Make sure your butter is truly softened for easy mixing, which results in light and fluffy dough.
- Chill the dough: Don’t skip the chilling steps! Chilling helps the dough firm up, making it easier to slice without losing shape.
- Measure flour accurately: Use the spoon-and-level method when measuring flour to avoid dense cookies. This keeps your dough just right.
- Experiment with colors: Feel free to mix different natural food colorings for unique designs. It adds creativity without compromising taste.
- Keep an eye on baking time: Every oven is different, so check your cookies a minute or two before the suggested baking time to prevent over-baking.
- Cool before serving: Allow the cookies to cool completely on a wire rack before serving. This helps them maintain their shape and texture.
Best Side Dishes for Slice and Bake Valentine’s Day Cookies
When enjoying slice and bake Valentine’s Day cookies, consider pairing them with these delightful side dishes that complement their sweetness.
-
Fresh Fruit Salad
A refreshing mix of seasonal fruits balances out the rich flavors of the cookies, adding brightness to your meal. -
Greek Yogurt Parfait
Layer Greek yogurt with granola and berries for a creamy contrast that pairs wonderfully with sweet treats like cookies. -
Chocolate-Covered Strawberries
These indulgent bites enhance the romantic vibe, perfect for any Valentine’s celebration alongside your sweet heart-shaped cookies. -
Cheese Board
A selection of mild cheeses can provide a savory bite against sweet flavors, creating an interesting taste experience when combined. -
Milkshakes
Creamy milkshakes are always a hit! They make an excellent pairing with cookies, especially when dipped. -
Nut Mix
A simple mix of nuts offers crunch and healthy fats, balancing sweetness while adding texture alongside your baked treats. -
Granola Bars
Homemade granola bars provide an alternative snack option that’s also sweet but less decadent than cookies, offering variety during snack time. -
Dark Chocolate Pieces
Rich dark chocolate pieces can be served as bites alongside your cookies, enhancing flavor combinations while keeping things elegant.
Common Mistakes to Avoid
When making Slice and Bake Valentine’s Day Cookies, avoid these common pitfalls to ensure your cookies turn out perfectly every time.
- Using cold butter: Cold butter can lead to dense cookies. Always use softened butter for a light and fluffy texture.
- Not chilling the dough enough: Skipping the refrigeration steps can make the dough too soft to handle. Chill the dough properly for easier slicing.
- Overmixing the dough: Overmixing can result in tough cookies. Mix just until combined for the best texture.
- Ignoring oven temperature: An inaccurate oven temperature can affect baking time and cookie texture. Use an oven thermometer to ensure accuracy.
- Cutting uneven slices: Uneven slices bake at different rates. Use a sharp knife and ensure each cookie is the same thickness for even baking.
Storage & Reheating Instructions
Refrigerator Storage
- Store in an airtight container for up to 5 days.
- Place parchment paper between layers to prevent sticking.
Freezing Slice and Bake Valentine’s Day Cookies
- Wrap tightly in plastic wrap or aluminum foil for up to 3 months.
- Label with the date for reference.
Reheating Slice and Bake Valentine’s Day Cookies
- Oven: Preheat to 350˚F and warm cookies for about 5-7 minutes.
- Microwave: Heat on medium power for 10-15 seconds, checking frequently.
- Stovetop: Warm in a skillet over low heat with a lid for a few minutes.
Frequently Asked Questions
Here are some common questions related to Slice and Bake Valentine’s Day Cookies.
Can I use different colors of food coloring?
Yes! Feel free to experiment with various natural food colorings to create vibrant designs.
How do I customize my Slice and Bake Valentine’s Day Cookies?
You can add sprinkles, chocolate chips, or nuts into the dough before chilling it for added flavor and texture.
What should I do if my dough is too sticky?
If your dough feels too sticky, gradually add more flour, a tablespoon at a time, until it reaches a workable consistency.
How long do these cookies last after baking?
When stored properly, baked Slice and Bake Valentine’s Day Cookies will remain fresh for up to 5 days in an airtight container.
Can I freeze unbaked cookie logs?
Absolutely! You can freeze unbaked logs of cookie dough; just slice them directly from the freezer when you’re ready to bake.
Final Thoughts
These Slice and Bake Valentine’s Day Cookies are not only easy to make but also fun to customize. With endless possibilities for colors and shapes, they are perfect for any occasion. Try them today and impress your loved ones with your baking skills!
Slice and Bake Valentine’s Day Cookies

Indulge in the nostalgia of childhood with these delightful Slice and Bake Valentine’s Day Cookies. This easy-to-follow recipe transforms ordinary cookie dough into vibrant, heart-shaped treats that are perfect for sharing with your loved ones. With no preservatives or artificial colors, these cookies offer a fresh and wholesome alternative to store-bought versions. Customize them with your favorite flavors or colors to make them uniquely yours! Ideal for any occasion, from Valentine’s Day festivities to everyday sweet cravings, these cookies are sure to impress friends and family alike.
- Prep Time: 30 minutes
- Cook Time: 12 minutes
- Total Time: 42 minutes
- Yield: Approximately 24 cookies 1x
- Category: Dessert
- Method: Baking
- Cuisine: American
Ingredients
- 3/4 cup unsalted butter, softened
- 1 cup granulated sugar
- 1 teaspoon vanilla extract
- 2 large eggs
- 2 1/2 cups all-purpose flour
- 1 teaspoon baking powder
- 1/2 teaspoon salt
- Natural food coloring (red or pink)
Instructions
- In a mixing bowl, cream together the softened butter and granulated sugar until light and fluffy.
- Add eggs one at a time, mixing until well combined after each addition.
- In another bowl, whisk together flour, baking powder, and salt. Gradually add this mixture to the wet ingredients until fully incorporated.
- Divide the dough; color one part with natural food coloring as desired.
- Chill both doughs before rolling out the colored dough into a rectangle and cutting out heart shapes.
- Stack hearts between plain dough and form a log; freeze until solid.
- Preheat oven to 350°F (175°C), slice the log into rounds, bake for about 12 minutes, then cool on wire racks.
Nutrition
- Serving Size: 1 cookie (18g)
- Calories: 85
- Sugar: 5g
- Sodium: 30mg
- Fat: 4g
- Saturated Fat: 2g
- Unsaturated Fat: 2g
- Trans Fat: 0g
- Carbohydrates: 11g
- Fiber: 0g
- Protein: 1g
- Cholesterol: 15mg