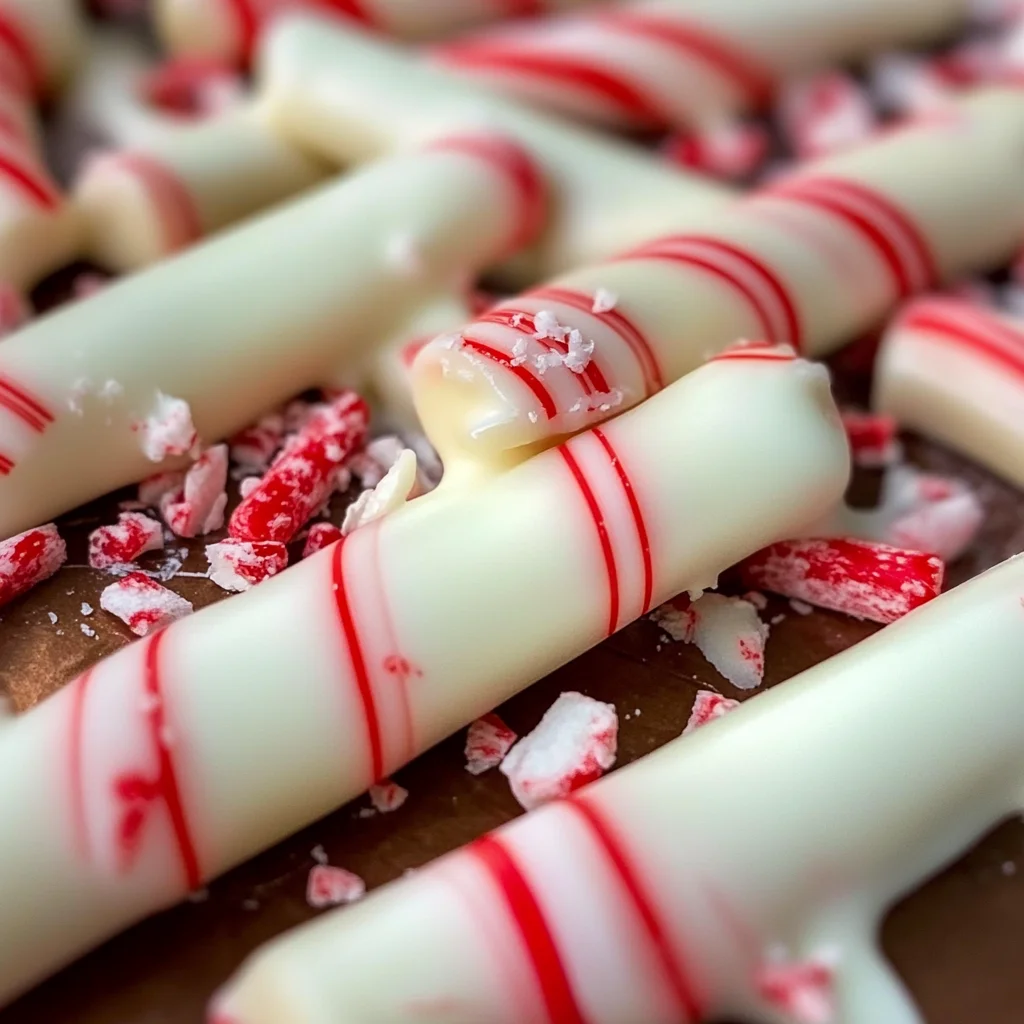
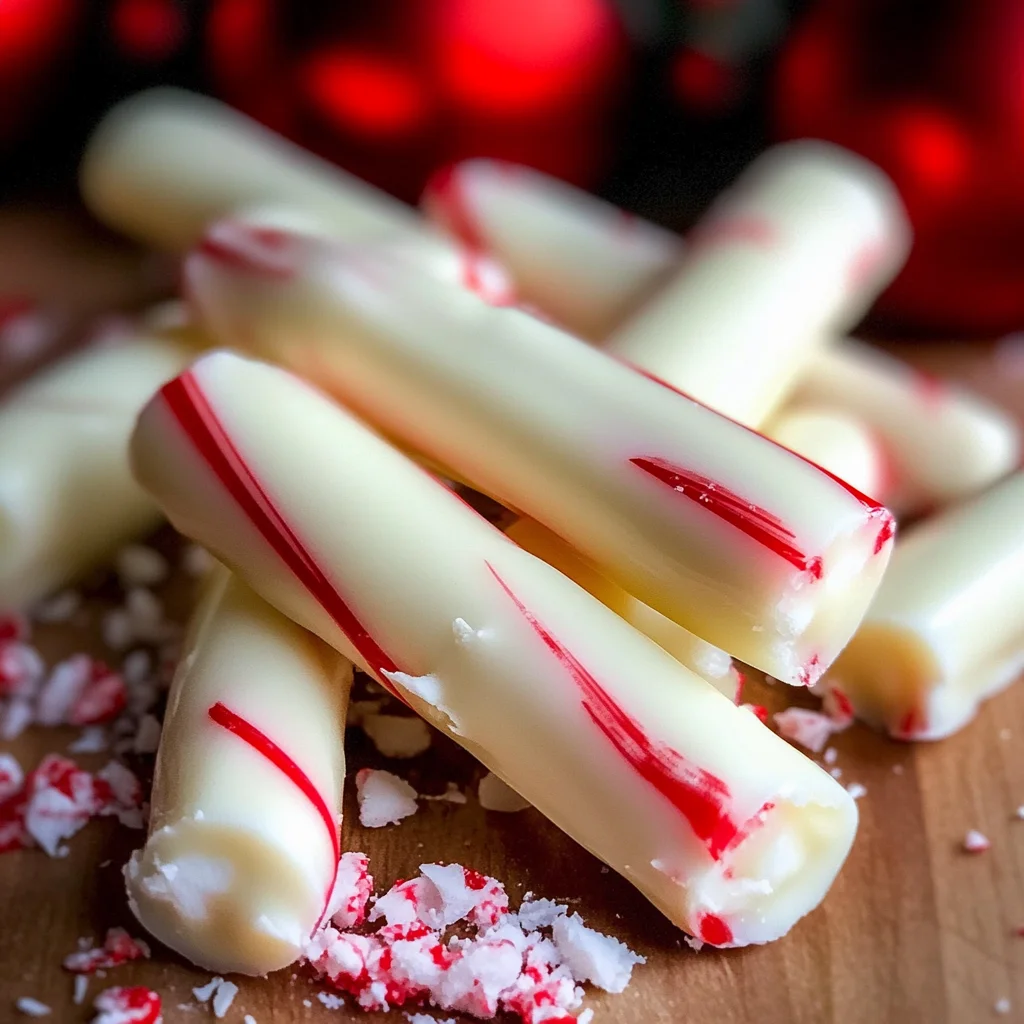
Homemade Christmas Peppermint Sticks
Homemade Christmas Peppermint Sticks are a delightful treat that adds a festive touch to any occasion. These sweet and minty delights are perfect for holiday gatherings, gift-giving, or simply enjoying at home. With their bright flavors and charming presentation, they stand out as a fun project to create with family and friends.
Why You’ll Love This Recipe
- Easy to Make: With minimal ingredients and steps, even novice bakers can whip these up quickly.
- Deliciously Minty: The combination of white chocolate and peppermint essence offers a refreshing flavor that embodies the spirit of the season.
- Versatile Treat: Use them as decorations on cakes or simply enjoy them on their own as a sweet snack.
- Perfect for Gifting: Wrap these peppermint sticks in festive packaging for a thoughtful homemade gift.
- Fun Activity: Involve kids or friends in the process for some joyful holiday bonding.
Tools and Preparation
Before diving into this sweet recipe, gather your tools to ensure a smooth cooking experience.
Essential Tools and Equipment
- Double boiler or microwave-safe bowl
- Baking sheet
- Parchment paper
- Rubber spatula
Importance of Each Tool
- Double boiler or microwave-safe bowl: These allow you to melt the white chocolate gently without burning it.
- Baking sheet: A sturdy surface to set your peppermint sticks while they cool.
- Parchment paper: Prevents sticking and makes cleanup easy when forming the sticks.
- Rubber spatula: Ensures you can easily mix and scrape down the sides of your bowl.
Ingredients
For the Peppermint Sticks
- 1 package of candy canes (12 pieces)
- 12 ounces of white chocolate
- 1 teaspoon peppermint essence
Servings: 4
Prep Time: 10 minutes
Cook Time: 10 minutes
Total Time: 70 minutes
How to Make Homemade Christmas Peppermint Sticks
Step 1: Prepare Your Workspace
Start by setting up your area. Line your baking sheet with parchment paper so it’s ready for assembling your peppermint sticks.
Step 2: Melt the White Chocolate
Melt the white chocolate using one of these methods:
1. In a double boiler over simmering water until smooth.
2. In a microwave-safe bowl, heat in 30-second intervals, stirring in between until fully melted.
Step 3: Add Peppermint Essence
Once melted, remove the chocolate from heat. Stir in peppermint essence, mixing well to incorporate the flavor evenly throughout the chocolate.
Step 4: Dip Candy Canes
Holding each candy cane by its curved end, dip it into the melted white chocolate. Ensure it’s fully coated but allows excess chocolate to drip off before placing it on the lined baking sheet.
Step 5: Cool and Set
Allow the coated candy canes to cool at room temperature until the chocolate hardens. For quicker results, place them in the refrigerator for about 30 minutes.
Step 6: Serve or Store
Once set, your Homemade Christmas Peppermint Sticks are ready! Enjoy immediately or store in an airtight container for later use.
How to Serve Homemade Christmas Peppermint Sticks
Homemade Christmas Peppermint Sticks are a delightful treat that can add festive cheer to any gathering. Here are some serving suggestions to make the most of your peppermint sticks.
On a Festive Platter
- Arrange several peppermint sticks on a colorful platter for an eye-catching centerpiece.
- Add small bowls of hot chocolate or milk for dipping.
As a Gift
- Wrap individual peppermint sticks in clear cellophane and tie with festive ribbons.
- Consider adding a personalized tag for a special touch.
In Hot Beverages
- Use peppermint sticks as stirring sticks in hot chocolate or warm milk, enhancing flavor while adding a festive look.
- They can also be used in tea for a refreshing twist.
As Holiday Decorations
- Hang peppermint sticks on your Christmas tree as edible ornaments.
- Place them in decorative jars to brighten up your holiday table.
How to Perfect Homemade Christmas Peppermint Sticks
Creating perfect Homemade Christmas Peppermint Sticks is easy with the right techniques. Follow these tips to ensure success.
- Choose Quality Chocolate: Using high-quality white chocolate will ensure a smooth and creamy coating.
- Crush Candy Canes Right: Crush candy canes into small, even pieces for an appealing crunch and texture.
- Temperature Control: Melt the white chocolate gently over low heat to prevent burning and achieve a smooth consistency.
- Add Peppermint Essence Wisely: Stir in peppermint essence slowly, tasting as you go, to avoid overpowering the chocolate flavor.
- Cool Properly: Allow the peppermint sticks to cool completely at room temperature before serving or packaging them.
Best Side Dishes for Homemade Christmas Peppermint Sticks
Pairing side dishes with your Homemade Christmas Peppermint Sticks can create a well-rounded festive menu. Here are some delicious options.
- Hot Chocolate – A rich and creamy drink that complements the minty flavor.
- Gingerbread Cookies – Spicy and sweet cookies that enhance the holiday spirit.
- Fruit Salad – A refreshing mix of seasonal fruits balances the sweetness of peppermint sticks.
- Cheese Platter – A variety of cheeses can offer a savory contrast to sugary treats.
- Mini Cupcakes – Light and fluffy cupcakes topped with festive sprinkles will delight guests of all ages.
- Spiced Nuts – Roasted nuts with spices provide a crunchy and savory snack option.
Common Mistakes to Avoid
Making Homemade Christmas Peppermint Sticks can be fun, but there are a few common pitfalls to watch out for.
- Not using quality chocolate: Using low-quality chocolate can lead to a poor flavor. Opt for good-quality white chocolate for the best results.
- Forgetting to temper the chocolate: If you don’t temper the chocolate, it may not set properly. Make sure to melt it gently and cool it slightly before using.
- Skipping the peppermint essence: This ingredient is key! Missing it means your sticks won’t have that classic peppermint flavor.
- Overheating the chocolate: Heating chocolate too fast can cause it to seize. Always melt it on low heat or use a double boiler for gentle heating.
- Ignoring cooling times: Not allowing enough time for the peppermint sticks to cool will affect their texture. Be patient and let them set completely before serving.
Storage & Reheating Instructions
Refrigerator Storage
-
- Duration: Store in the fridge for up to 2 weeks.
-
- Container: Keep in an airtight container to maintain freshness.
Freezing Homemade Christmas Peppermint Sticks
-
- Duration: These can be frozen for up to 3 months.
-
- Container: Use a freezer-safe airtight container, separating layers with parchment paper.
Reheating Homemade Christmas Peppermint Sticks
- Oven: Preheat the oven to 200°F (93°C). Place the sticks on a baking sheet and warm them for about 5-10 minutes until they soften slightly.
- Microwave: Heat in short bursts of 5-10 seconds, checking frequently to prevent melting too much.
- Stovetop: Use a double boiler on low heat, placing the peppermint sticks in a bowl over simmering water until they are just soft enough for use.
Frequently Asked Questions
Here are some common questions about making Homemade Christmas Peppermint Sticks.
How do I make Homemade Christmas Peppermint Sticks?
To make these sticks, crush candy canes, melt white chocolate, mix in peppermint essence, and dip the candy cane halves into the mixture before letting them cool.
Can I customize my Homemade Christmas Peppermint Sticks?
Absolutely! You can add different extracts or sprinkle toppings like crushed nuts or sprinkles after dipping them in chocolate.
How long does it take to make Homemade Christmas Peppermint Sticks?
The total time is about 70 minutes, including prep and cooling time.
What types of candy can I use besides candy canes?
You can experiment with other hard candies, but ensure they have similar textures for best results.
Final Thoughts
These Homemade Christmas Peppermint Sticks are not only delightful treats but also great gifts during the holiday season. They are versatile and easy to customize with various toppings or flavors. Try making these festive sweets with family and enjoy creating lasting memories together!
Homemade Christmas Peppermint Sticks

Homemade Christmas Peppermint Sticks are the perfect festive treat to brighten up your holiday celebrations. With just three simple ingredients, these sweet and minty delights are not only easy to make but also serve as delightful gifts for friends and family. The combination of creamy white chocolate and refreshing peppermint essence creates a flavor that perfectly encapsulates the holiday spirit. Whether enjoyed on their own, used as cake decorations, or stirred into hot beverages, these peppermint sticks are bound to become a seasonal favorite. Involve your loved ones in this fun and creative project, and savor the joy of making delicious holiday treats together.
- Prep Time: 10 minutes
- Cook Time: 10 minutes
- Total Time: 20 minutes
- Yield: Servings: 4
- Category: Dessert
- Method: Baking
- Cuisine: American
Ingredients
- 1 package of candy canes (12 pieces)
- 12 ounces of white chocolate
- 1 teaspoon peppermint essence
Instructions
- Prepare your workspace by lining a baking sheet with parchment paper.
- Melt the white chocolate using a double boiler or microwave until smooth.
- Stir in peppermint essence thoroughly.
- Dip each candy cane into the melted chocolate, allowing excess to drip off before placing them on the baking sheet.
- Let the coated candy canes cool at room temperature or refrigerate for quicker setting.
- Once hardened, enjoy immediately or store in an airtight container.
Nutrition
- Serving Size: 1 serving
- Calories: 60
- Sugar: 8g
- Sodium: 2mg
- Fat: 3g
- Saturated Fat: 2g
- Unsaturated Fat: 1g
- Trans Fat: 0g
- Carbohydrates: 7g
- Fiber: 0g
- Protein: 0g
- Cholesterol: 0mg